Singer Handheld Sewing Machine Manual: A Comprehensive Guide

Discover essential resources for your Singer handheld machine! Find manuals, troubleshooting tips, and guides for models like the XL1000 and Heavy Duty 4452.
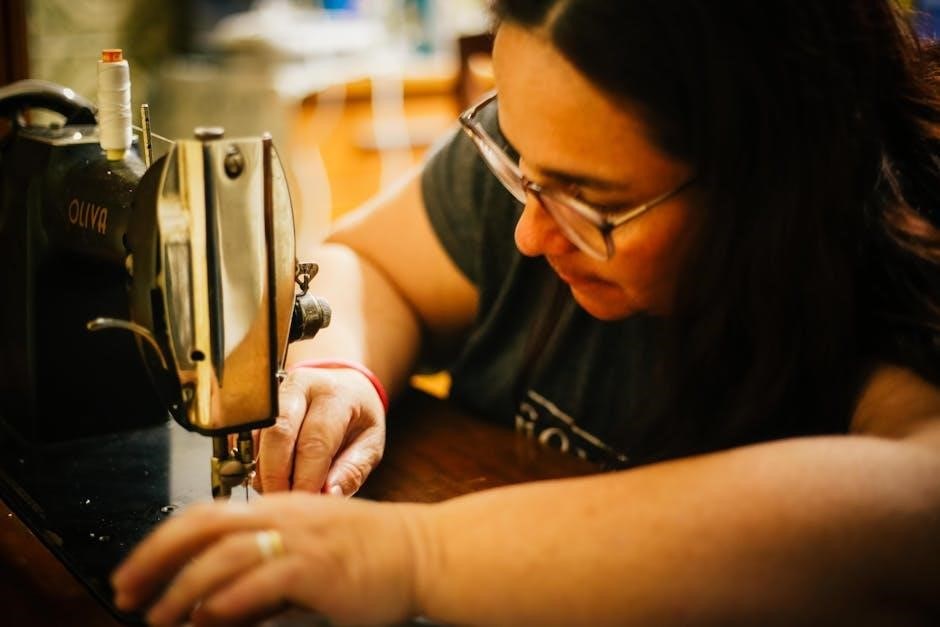
Singer handheld sewing machines represent a remarkable evolution in sewing technology, offering portability and convenience without sacrificing the renowned quality associated with the Singer brand. These compact machines are ideal for quick repairs, crafting projects, and situations where a traditional sewing machine is impractical. Dating back to Isaac Singer’s 1851 patent for the first practical sewing machine, Singer has consistently innovated, and handheld models are a testament to this ongoing commitment.
Today’s handheld machines, like those available as PDFs for models 15-91 and 15K, provide accessible sewing solutions for beginners and experienced users alike. They often feature built-in stitches, adjustable speed settings, and the capability to handle various fabric types. Resources like the XL1000 instruction manual demonstrate the features available, while the Heavy Duty 4452 showcases Singer’s dedication to robust performance. Whether you’re seeking a simple mending tool or a portable crafting companion, a Singer handheld machine delivers reliable functionality and ease of use.
History of Singer Sewing Machines
The story of Singer sewing machines began in 1851 with Isaac Singer’s groundbreaking patent for a practical sewing machine. This innovation revolutionized the garment industry and home sewing, transforming a laborious handcraft into a mechanized process. Initially facing legal challenges regarding existing patents, Singer cleverly circumvented these by creating a fundamentally new design, establishing the Singer Manufacturing Company.
Throughout the late 19th and 20th centuries, Singer became synonymous with sewing, pioneering advancements like the electric sewing machine and various stitch mechanisms. The company’s commitment to quality and innovation cemented its position as a global leader. While the focus has broadened over time to include a diverse range of sewing solutions – including handheld models documented in manuals like those for the XL1000 and Heavy Duty 4452 – the core principles of reliability and user-friendliness remain. Even today, accessing resources like PDF manuals for older models (15-91, 15K) demonstrates Singer’s enduring legacy and support for its products.
Types of Singer Handheld Sewing Machines
Singer offers a variety of handheld sewing machines catering to diverse needs, from quick repairs to more substantial projects. These compact machines are prized for their portability and ease of use, making them ideal for beginners or those requiring on-the-go mending solutions. Manuals, such as the “Handheld Mending Manual EN,” highlight their simplicity and focus on essential stitches.
While not explicitly detailed in the provided snippets, the range likely includes basic handheld models for simple seams and repairs, and potentially more advanced versions with features like adjustable speed or stitch selection. The Heavy Duty 4452, though a full-size machine, represents Singer’s commitment to durable construction, a quality often mirrored in their handheld offerings. Accessing specific instruction manuals (like those for the XL1000) is crucial for understanding the capabilities of each model. Resources also point to White handheld machines, often bearing the Singer logo, indicating collaborations or branded variations. Finding the correct manual (PDF format often available) ensures optimal performance and longevity.
Understanding the Parts of Your Handheld Machine
A Singer handheld sewing machine, despite its compact size, comprises several key components essential for operation. While specific manuals (like those for the XL1000 or the “Handheld Mending Manual EN”) provide detailed diagrams, common parts include the power switch, handwheel for manual control, needle clamp and needle, presser foot, and feed dogs which advance the fabric.
Crucially, understanding the bobbin case and how it interacts with the needle is vital for proper stitch formation. The tension dial controls thread tightness, impacting stitch quality. Many models feature a simple threading path, detailed in their respective instruction manuals; Recognizing these parts, and referencing the appropriate PDF manual, allows for confident assembly, threading, and troubleshooting. The White handheld machines, often branded with the Singer logo, share similar core components. Familiarizing yourself with these elements, before beginning a project, ensures a smoother sewing experience and prevents potential issues.
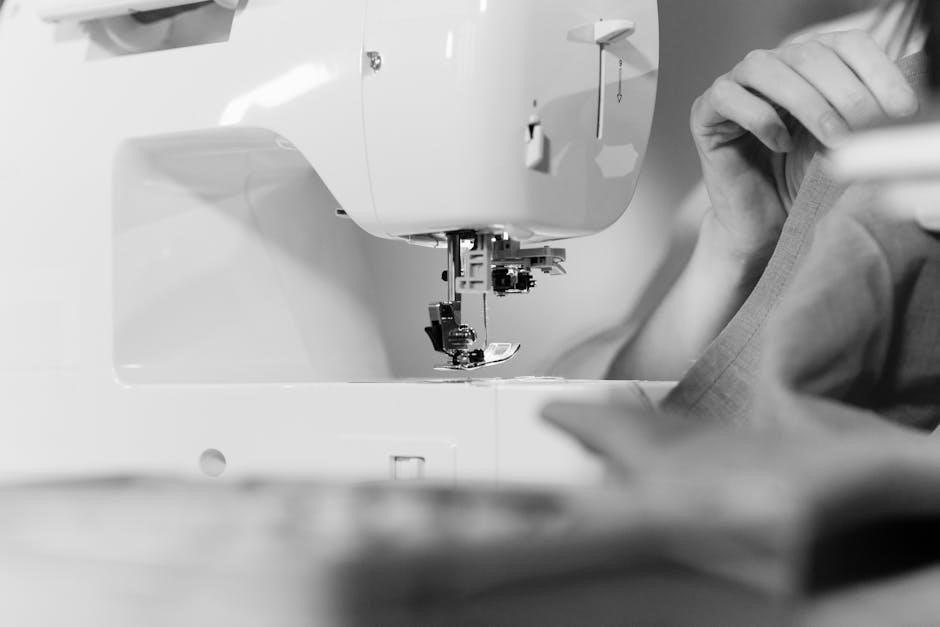
Setting Up Your Singer Handheld Sewing Machine
Before you begin sewing with your Singer handheld machine, proper setup is crucial. First, ensure a stable, well-lit workspace. Consult your specific model’s manual – whether it’s for the XL1000, a basic handheld mending machine, or a Heavy Duty 4452 – for detailed instructions.
Typically, this involves inserting batteries or connecting the power adapter. Next, attach the correct presser foot for your intended fabric and stitch. Ensure the machine is threaded correctly (refer to the threading guide in your manual). Properly winding the bobbin, as detailed in the manual, is also essential. Test the machine with scrap fabric to verify stitch settings and tension. A quick review of safety precautions, outlined in the manual, is always recommended. Following these steps, guided by your machine’s specific PDF manual, will guarantee a successful and enjoyable sewing experience, avoiding common initial frustrations.
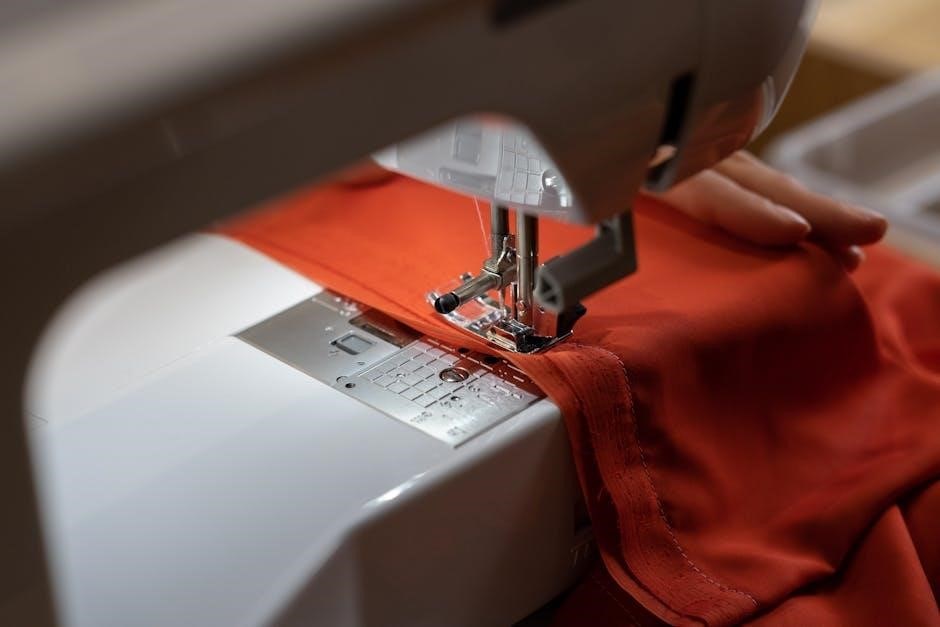
Threading the Machine
Correct threading is paramount for proper stitch formation on your Singer handheld sewing machine. Always refer to the threading diagram specific to your model – whether it’s a simple handheld mender or a more complex XL1000 or 4452. Typically, threading involves guiding the thread from the spool, through tension discs, and down to the needle.
Ensure the presser foot is raised during threading to release tension. Follow the numbered path indicated in your manual precisely. Incorrect threading can lead to skipped stitches, thread breakage, or uneven stitching. Pay close attention to any thread guides or take-up levers. After threading the needle, draw up a sufficient length of thread and test the machine with scrap fabric. If issues arise, re-thread carefully, consulting the PDF manual for clarification. Mastering this skill, as detailed in resources like the Singer 15-91 manual, is fundamental to successful sewing.
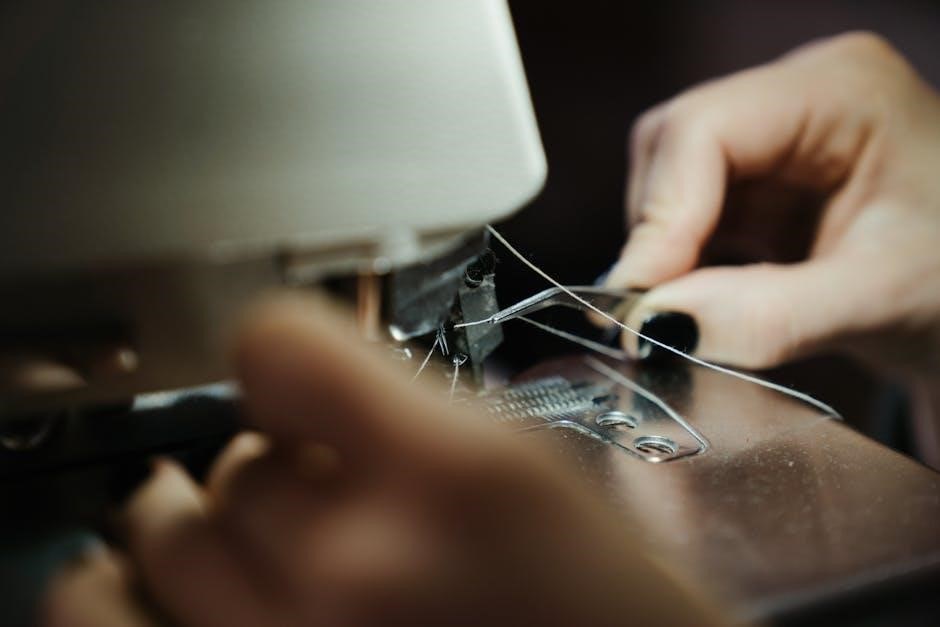
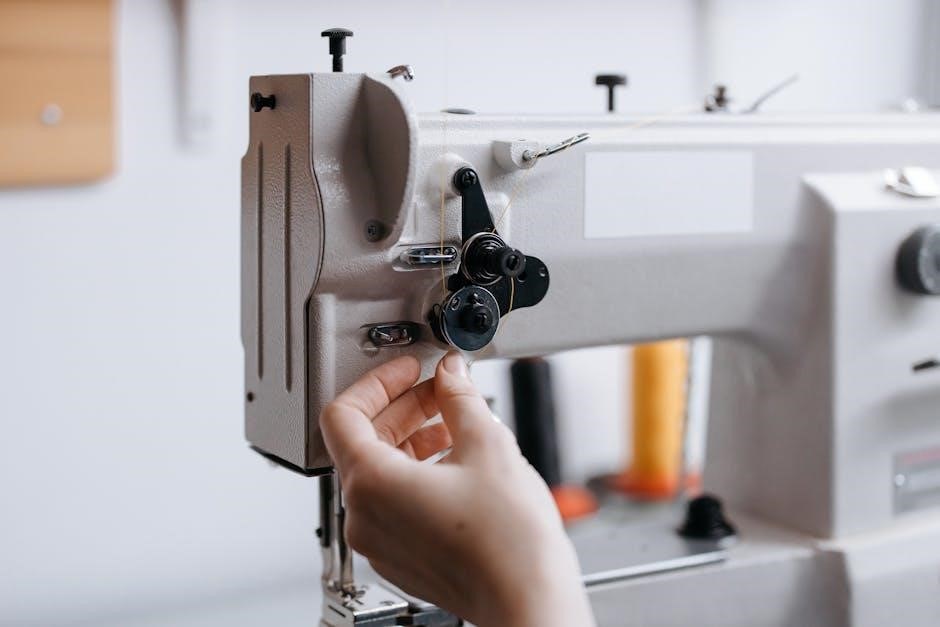
Winding the Bobbin
Properly winding the bobbin is crucial for consistent stitch quality with your Singer handheld sewing machine. Begin by placing the spool of thread on the spool pin. Guide the thread through the designated thread guides leading to the bobbin winder. Secure the thread end into the bobbin, ensuring it’s firmly in place.
Engage the bobbin winder mechanism – typically by sliding a lever or pressing a button – and begin winding. Most machines have a speed control for bobbin winding. Allow the bobbin to fill evenly, avoiding overfilling, which can cause issues. Once full, the winder should automatically stop. Disengage the winder and remove the bobbin. Refer to your specific model’s manual (like those for the 15-91 or XL1000) for detailed diagrams. A correctly wound bobbin, as outlined in available PDF guides, ensures smooth and reliable sewing performance.

Basic Sewing Techniques
Mastering fundamental sewing techniques unlocks the full potential of your Singer handheld machine. Start with straight stitching, guiding the fabric gently under the presser foot while maintaining a consistent speed. Practice pivoting the fabric for corners, lifting the presser foot as needed to avoid puckering. Backstitching at the beginning and end of seams secures the stitches, preventing unraveling.
Explore simple seam allowances, typically 5/8 inch, and learn to accurately follow marked guidelines on your fabric. Utilize the stitch length adjustments (discussed elsewhere in the manual) to suit different fabric weights. For beginners, resources like those accompanying the XL1000 or general Singer manuals offer visual aids. Remember to always test stitch on scrap fabric before starting your project. Consistent practice, guided by available PDF resources, builds confidence and skill with your machine.
Stitch Selection and Adjustment
Your Singer handheld machine offers a variety of stitches, catering to diverse sewing needs. The Heavy Duty 4452, for example, boasts 32 built-in options. Refer to your machine’s manual – often available as a PDF download – to identify each stitch and its intended use. Common stitches include straight, zigzag, and buttonhole settings.
Adjusting stitch length and width is crucial for achieving desired results. Shorter stitch lengths are ideal for delicate fabrics or reinforcing seams, while longer lengths are suitable for basting. Zigzag stitch width controls the side-to-side deviation, useful for finishing raw edges or creating decorative effects. Experiment with these settings on scrap fabric to understand their impact. The XL1000 manual provides detailed guidance on these adjustments. Precise control over stitch parameters ensures professional-looking projects, maximizing your machine’s capabilities.
Troubleshooting Common Problems
Encountering issues with your Singer handheld machine is common, but often easily resolved. A frequent problem is thread bunching, usually caused by improper threading or incorrect bobbin winding. Always re-thread the machine following the manual’s instructions – PDFs are readily available online for models like the 15-91 and XL1000.
Another issue is skipped stitches, potentially stemming from a dull or incorrectly inserted needle. Ensure the needle is the correct type and size for your fabric. If the machine jams, stop immediately and carefully remove the fabric, checking for tangled threads. Consult your manual for specific troubleshooting steps related to your model, like the 4452. Remember safety first – always unplug the machine before attempting repairs. Online resources and support forums can also provide valuable assistance when facing persistent problems.

Replacing the Needle
Regular needle replacement is crucial for optimal sewing performance. A bent, dull, or damaged needle can cause skipped stitches, fabric damage, and even machine malfunction. Always refer to your Singer handheld sewing machine manual (available as PDFs for models like 15-91, XL1000) for specific instructions, as procedures can vary slightly.
Typically, you’ll need to loosen a set screw on the needle clamp, remove the old needle, and insert a new one with the flat side facing the back. Ensure the needle is fully inserted and the set screw is securely tightened. Use the correct needle type and size for your fabric – universal needles work for many fabrics, but specialized needles are available for knits, denim, and leather. Discard used needles safely to prevent injury. Proper needle replacement contributes significantly to the longevity and efficiency of your Singer machine.
Changing the Presser Foot
Adapting your Singer handheld sewing machine to different fabrics and techniques often requires changing the presser foot. Your machine manual (like those available for the XL1000 or Heavy Duty 4452) will detail the specific process for your model. Generally, this involves loosening a screw or latch on the presser foot holder.
Carefully lift the presser foot bar to its highest position, then release the foot by pressing the release button (if equipped) or unscrewing the retaining screw. Align the new presser foot with the holder and snap or screw it into place, ensuring it’s securely attached. Different feet are available for zippers, buttonholes, blind hems, and more. Using the correct foot dramatically improves stitch quality and ease of sewing. Always consult your manual for compatibility and proper installation to avoid damaging your machine or the foot itself.
Maintaining Your Machine: Cleaning and Oiling
Regular maintenance is crucial for the longevity and performance of your Singer handheld sewing machine. Dust, lint, and oil buildup can hinder its operation. Begin by unplugging the machine! Use a soft brush (often included with your machine, or referenced in manuals like those for the XL1000) to remove lint from the bobbin area, feed dogs, and around the needle plate.
Periodically, apply a drop of sewing machine oil to the designated oiling points – your manual will illustrate these. Avoid over-oiling, as excess oil attracts dust. A clean machine sews more smoothly and accurately. For deeper cleaning, a lint brush or compressed air can be helpful. Remember to consult your specific model’s manual (including those for the Heavy Duty 4452) for detailed cleaning instructions and recommended oil types. Consistent care prevents malfunctions and extends the life of your Singer.
Understanding Stitch Length and Width
Mastering stitch length and width unlocks creative potential with your Singer handheld sewing machine. Stitch length determines the distance between stitches; shorter lengths are ideal for delicate fabrics, while longer lengths suit heavier materials. Adjust this using the designated dial or buttons, often detailed in manuals like those for the XL1000.
Stitch width controls the zigzag pattern’s breadth. A narrower width creates a straight stitch, while increasing it produces a wider zigzag. This is essential for decorative stitching and finishing raw edges. Experiment with different settings on models like the Heavy Duty 4452 to understand their effects. Refer to your machine’s manual for specific guidance on adjusting these parameters. Proper stitch selection ensures fabric integrity and aesthetic appeal. Understanding these controls allows for precise and professional sewing results.
Advanced Techniques: Darning and Applique
Elevate your sewing skills with darning and applique using your Singer handheld machine! Darning repairs holes in fabric, utilizing a zigzag stitch to weave new threads over the damaged area. Lower the presser foot and adjust stitch length for optimal results, referencing your machine’s manual – perhaps for a model like the 4452 – for specific settings.

Applique involves attaching fabric shapes onto a base cloth. Utilize a satin stitch or zigzag stitch to secure the applique pieces. Stabilizers can prevent puckering. Explore decorative stitches available on machines like the XL1000 for unique applique designs. Detailed instructions are often found within the comprehensive manuals available online. Mastering these techniques expands your creative possibilities, allowing for personalized repairs and embellishments. Remember to practice on scrap fabric first to refine your technique and achieve professional-looking results.
Safety Precautions
Prioritize safety when operating your Singer handheld sewing machine! Always disconnect the power supply before threading, changing the needle, or performing any maintenance. Keep fingers away from the needle while sewing – accidental punctures can occur. Never force the fabric; let the machine feed it smoothly.

Ensure adequate lighting to clearly see your work and avoid eye strain. Store the machine in a safe, dry place, inaccessible to children. Refer to your specific model’s manual – such as those for the XL1000 or Heavy Duty 4452 – for detailed safety guidelines. Avoid using damaged power cords or attempting repairs yourself; seek professional assistance. Regularly inspect the machine for any loose parts or malfunctions. Following these precautions will help prevent injuries and ensure a safe and enjoyable sewing experience. Always read the complete manual before first use!
Finding Manuals and Support Resources
Locating your Singer handheld sewing machine manual is easier than ever! Singer’s official website offers a comprehensive library of downloadable manuals for both current and older models, including the XL1000 and Heavy Duty 4452. You can find PDFs for machines like the 15-91, 15K, and 15K1, as well as user guides for models like the C430, C5200, and S0705.
Beyond the website, numerous online resources provide support and troubleshooting assistance. Many sewing communities and forums offer helpful advice from experienced users. If you require direct assistance, Singer’s customer support team is available to answer your questions. Remember to have your machine’s model number handy when seeking support. Explore these resources to maximize your sewing experience and keep your Singer machine running smoothly for years to come. Don’t hesitate to utilize these valuable tools!
Singer XL1000 Sewing Machine Instruction Manual Overview
The Singer XL1000 Sewing Machine Instruction Manual is a vital resource for unlocking the full potential of this popular model. This comprehensive guide details everything from initial setup and threading to advanced sewing techniques. Users will find clear, step-by-step instructions accompanied by helpful diagrams, ensuring a smooth learning curve.
Key sections cover stitch selection, adjustment of stitch length and width, and troubleshooting common issues. The manual also provides guidance on maintaining your machine, including cleaning and oiling procedures. It’s a downloadable PDF, readily accessible on Singer’s website, offering convenient access to information whenever needed. Mastering the XL1000 requires understanding its features, and the manual is the key to doing so effectively. It empowers both beginners and experienced sewers to create beautiful projects with confidence and precision.
Heavy Duty 4452 White Sewing Machine Features
The SINGER Heavy Duty 4452 White Sewing Machine is engineered for durability and power, boasting 32 built-in stitches to tackle a wide range of projects. Its robust metal frame provides stability, even during high-speed sewing, making it ideal for heavier fabrics like denim and canvas. This machine doesn’t just offer strength; it also delivers versatility with adjustable stitch length and width, allowing for customized creations.
Features include an extra-high presser foot lifter, accommodating thicker materials with ease, and a convenient needle threader for simplified setup. The 4452 is designed for both beginners and seasoned sewists, offering a balance of user-friendliness and professional capabilities. Detailed instructions are available in the accompanying manual, guiding users through each function and ensuring optimal performance. It’s a reliable workhorse built to withstand frequent use and deliver consistent, high-quality results.