Discover the versatility of Oster bread maker recipes, offering traditional white bread, gluten-free options, and specialty loaves like banana and pumpkin bread. With resources like PDF manuals and troubleshooting tips, bakers of all levels can achieve perfect results. Explore step-by-step guides, yeast usage, and machine-specific instructions for flawless bread making.
Traditional White Bread Recipes
Traditional white bread recipes for Oster bread makers include bread flour, yeast, water, salt, and sugar. Adjusting ratios enhances texture and flavor. Proper mixing and baking settings ensure a soft crumb and golden crust.
Basic Ingredients and Instructions
For traditional white bread, combine 3 cups of bread flour, 1 teaspoon of salt, 1 tablespoon of sugar, and 1 packet of active dry yeast. Add 1 cup of warm water (not hot) and 1 tablespoon of butter or oil. Mix ingredients in the Oster bread maker, select the basic bread setting, and choose the 2-pound loaf size. Let the machine complete the cycle for a perfectly baked loaf. Allow the bread to cool before slicing.
Adjusting Ingredient Ratios
Adjusting ingredient ratios in Oster bread maker recipes allows for customization. To enhance texture, increase flour by 10% for denser bread or decrease for lighter loaves. Yeast can be reduced by ¼ teaspoon for slower rises. Salt and sugar levels can be tweaked for flavor balance. Liquids may need adjustment based on flour type; start with the recommended amount and modify as needed for optimal dough consistency.

Gluten-Free Recipes
Oster bread maker gluten-free recipes offer variety by using rice, almond, and coconut flours. Xanthan gum enhances texture. Choose gluten-free settings for perfect results and flavor.
Ingredients and Method
For gluten-free bread, combine 1 ½ cups of gluten-free flour blend, 1 tsp xanthan gum, 1 tsp salt, and 1 tbsp sugar. Add 2 cups warm water, 1 tbsp oil, and 1 tsp yeast. Mix in the Oster bread maker pan, ensuring dry and wet ingredients are layered correctly. Select the gluten-free setting and 1.5-pound loaf size. Let the machine handle mixing, kneading, and baking for a perfect rise and texture.
Ensuring Proper Rise
To achieve a proper rise in gluten-free bread, ensure yeast is fresh and active. Use warm water (not hot) at 100°F–110°F to activate yeast. Maintain a consistent, draft-free environment during baking. Avoid overmixing dough, as it can kill yeast activity; Check expiration dates of ingredients. Use the gluten-free setting on your Oster bread maker, which adjusts rise times for better results. Monitor rise cycles for optimal texture.

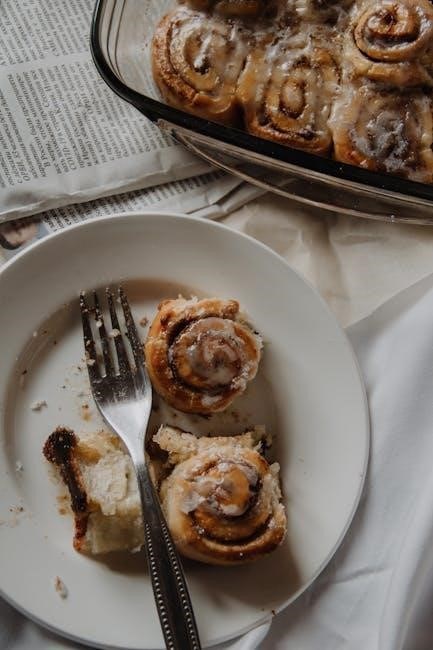
Banana Bread Recipes
Banana bread recipes for Oster Bread Maker simplify baking with ripe bananas, flour, sugar, eggs, and spices. Perfect for homemade treats, ensuring moist and flavorful results every time.
Ingredients and Setup
Banana bread recipes require ripe bananas, all-purpose flour, sugar, eggs, and vanilla extract. Optional additions include nuts or chocolate chips. Peel and mash bananas using a fork for a chunky texture or blend for smoothness. Combine wet and dry ingredients separately, then mix gently. Set up your Oster Bread Maker with the dough setting, ensuring ingredients are added in the correct order for optimal mixing and baking results.
Achieving Moisture Balance
To ensure your banana bread stays moist, use very ripe bananas for natural sweetness and moisture. Incorporate the right amount of fat, like butter or oil, to maintain tenderness without greasiness. Balance sugar levels to retain moisture without over-sweetening. Eggs add both moisture and richness; consider an extra yolk for added moisture. Opt for all-purpose flour over bread flour to avoid density. Adjust additional liquids like milk or yogurt carefully to prevent sogginess. Avoid overmixing to keep the texture tender. Monitor baking time and temperature to avoid drying out the bread. Consider adding nuts or chocolate chips for texture and flavor. A touch of vinegar or buttermilk can enhance tenderness. Cool the bread properly—covered to retain moisture, but not too soon to prevent sogginess. Store in an airtight container at room temperature to maintain freshness and moisture levels.
Troubleshooting Common Issues
Common issues include uneven crust, dense bread, or dough sticking. Check yeast expiration, ensure proper temperature, and verify ingredient measurements. Adjust settings or recipes as needed.
Crust Thickness
For optimal crust thickness in Oster bread maker recipes, adjust the crust setting to light, medium, or dark. Ensure proper ingredient ratios, as excess yeast or liquid can affect crust texture. Avoid overmixing dough, as it can lead to a denser crust. Monitor baking progress to achieve desired crispiness by checking during the cycle for consistent results.
Dough Consistency
Dough consistency in Oster bread maker recipes is crucial for even baking. Ensure flour is measured accurately, as excess can lead to dry dough, while too little may result in a sticky mess. Check the dough during the initial mixing phase; it should form a smooth, elastic ball. If needed, gradually add small amounts of flour or water to achieve the right texture for proper rising and baking performance.
Step-by-Step Guide
A step-by-step guide for Oster bread maker recipes ensures perfect results. Measure ingredients, select settings, and monitor progress for consistent baking success, even for beginners.
- Measure ingredients accurately for best results.
- Select the right settings for your recipe.
- Monitor the baking process for optimal outcomes.
- Clean the machine regularly for maintenance.
Mixing and Kneading
Proper mixing and kneading are crucial for Oster bread maker recipes. Add ingredients in the recommended order, typically liquids first, then dry ingredients. Use the dough setting for optimal kneading. Ensure the dough forms a smooth ball; scrape sides if needed. Overmixing can lead to dense bread, so monitor the machine’s cycle. Adjust settings for sticky or dry dough to achieve the perfect consistency for rising.
Baking Process
The baking process in Oster bread makers involves preheating and controlled temperature cycles. Choose the right cycle for your recipe, such as basic, whole wheat, or rapid bake. Monitor the machine’s progress to ensure even cooking. Crust settings allow customization of color and crispiness. Once baked, let the bread cool in the machine or on a rack to prevent sogginess. Proper baking ensures a perfectly cooked loaf every time.
Optional Settings
Oster bread makers offer customizable options like crust color, delay start, and loaf size. These settings enhance flexibility, allowing users to tailor recipes to their preferences easily.
Crust Settings
Oster bread makers typically offer three crust settings: Light, Medium, and Dark. These options allow users to customize the crust color and texture. The Light setting bakes the crust gently, resulting in a softer texture, while the Dark setting extends the baking time for a crisper, golden-brown crust. The Medium setting balances both texture and color. Adjusting these settings ensures the perfect crust for various bread types, enhancing the overall baking experience.
Delay Start Timer
The Delay Start Timer allows users to program the bread maker up to 13 hours in advance. This feature is ideal for preparing ingredients in the morning and having freshly baked bread ready later in the day. Simply load the ingredients, set the timer, and the machine will automatically start the baking process at the specified time, ensuring a convenient and fresh baking experience.
Different Loaf Sizes
Oster bread makers offer versatility with various loaf sizes, accommodating different household needs. Models typically support 1-pound, 1.5-pound, and 2-pound loaves, ensuring fresh bread for any gathering size.
1-Pound Loaf
A 1-pound loaf is ideal for small households or those preferring a compact bread size. It uses reduced ingredient quantities compared to larger loaves, typically requiring about 2 cups of flour, 1 teaspoon of yeast, and 1 tablespoon of sugar. Adjust liquids accordingly to maintain dough consistency. Perfect for singles or couples, this size ensures fresh bread without excess. Refer to your Oster bread maker manual for precise measurements and settings to achieve the best results.
1.5-Pound Loaf
The 1.5-pound loaf is a versatile size, perfect for small families or those who want a generous portion without excess. It typically requires 2.5 cups of flour, 1.25 teaspoons of yeast, and 1.25 tablespoons of sugar. Liquids should be adjusted to maintain a smooth dough. Baking time is slightly longer than the 1-pound loaf, ensuring a golden crust and evenly cooked interior. Ideal for everyday use, this size offers a balanced yield for fresh bread lovers.
2-Pound Loaf
The 2-pound loaf is ideal for larger families or those who prefer a hearty bread supply. It requires 3 cups of flour, 1.5 teaspoons of yeast, and 1.5 tablespoons of sugar. Liquids should be increased to 1.25 cups of water, with salt adjusted accordingly. Baking time is longer, ensuring a golden crust and even cooking. Perfect for households needing ample bread, this size is a popular choice for its generous yield and robust texture.

Measuring Ingredients
Accurate measurement ensures perfect bread texture and rise. Use a digital scale for precise flour and yeast quantities. Precise ratios of liquid to dry ingredients are crucial for optimal results.
Importance of Accuracy
Precise measurement of ingredients is vital for achieving consistent results in bread making; Incorrect proportions can affect dough rise, texture, and flavor. Over- or under-measuring yeast, flour, or liquids disrupts balance, potentially leading to dense or soggy loaves. Using a digital scale ensures accuracy, especially for flour, which can vary in density. Always measure liquids separately to maintain proper hydration levels for optimal dough formation and baking performance.
Using Weight Measurements
For precise bread making, weight measurements are preferred over volume. A digital scale ensures accurate ingredient proportions, essential for consistent results. Typically, recipes require 3-4 cups of flour (around 12-16 ounces) and 1-2 tablespoons of yeast (0.25-0.5 ounces). Weighing liquids like water (usually 1-1.5 cups or 8-12 ounces) ensures proper hydration. This method minimizes errors and enhances dough quality, making it ideal for Oster bread maker recipes.
Yeast Types and Usage
Active dry yeast and bread machine yeast are commonly used. Active dry yeast requires activation, while bread machine yeast is designed for instant use in recipes. Always measure yeast accurately, as excess can cause over-proofing. Store yeast in a cool, dry place to maintain potency and ensure proper dough rise in Oster bread maker recipes.
Active Dry vs. Bread Machine Yeast
Active dry yeast requires activation with warm water before use, while bread machine yeast is instant and can be mixed directly into dough. Active dry yeast offers better rise in traditional recipes, while bread machine yeast is designed for quick cycles. Both work well in Oster bread makers, but active dry yeast provides a lighter texture. Store both in a cool, dry place for optimal performance and freshness.
Adjusting Yeast Quantity
Yeast quantity is crucial for proper rise and flavor. Typically, 1–2 teaspoons of yeast are used per 3 cups of flour. Adjust based on recipe size and type. High-sugar or salty doughs may require more yeast, while bread machine yeast often needs less. Always measure accurately, as excess yeast can cause off-flavors, while too little may result in a dense loaf. Adjustments may vary depending on the recipe and machine settings.
Holiday and Specialty Recipes
Explore festive breads like hot cross buns, pumpkin bread, and hearty fruit loaves. These recipes add spices, herbs, and sweet ingredients for unique flavor profiles and textures.
Hot Cross Buns
Hot cross buns are a delightful addition to your holiday baking. Made with enriched dough, spices, and dried fruits, they’re perfect for Easter. Use your Oster bread maker to simplify the process. Add ingredients like flour, yeast, sugar, warm milk, butter, eggs, cinnamon, and currants. Select the sweet bread setting and let the machine knead and bake. Top with a cross made from flour paste before baking for an authentic touch.
Pumpkin Bread
Pumpkin bread is a seasonal favorite, blending the warmth of spices with the sweetness of pumpkin. Combine flour, sugar, pumpkin puree, yeast, warm water, melted butter, cinnamon, nutmeg, and ginger in your Oster bread maker. Select the quick bread or cake setting for a moist, flavorful loaf. Optional additions like nuts or raisins enhance texture and taste. Perfect for fall gatherings or as a holiday gift, this recipe offers a delicious twist on traditional bread.

Model-Specific Instructions
Discover tailored recipes and settings for Oster models like CKSTBRTW20 and 5838 Expressbake. Each model offers unique features like delay timers and crust settings to enhance bread-making.
Oster CKSTBRTW20
The Oster CKSTBRTW20 model is known for its 2-pound loaf capacity and customizable crust settings. For optimal results, use recipes tailored to its size and features. Ensure ingredients are measured accurately, and leverage the delay timer for convenience. The non-stick pan and cool-touch exterior enhance usability. Refer to the user manual for specific settings and troubleshooting tips to achieve perfect loaves every time with this versatile bread maker.
Oster 5838 Expressbake
The Oster 5838 Expressbake is designed for rapid bread making, producing a 2-pound loaf in under an hour. Its ExpressBake feature is ideal for quick recipes, while customizable crust settings ensure versatility. Use the 13-hour delay timer for convenience. The non-stick pan and intuitive controls make it user-friendly; For best results, follow recipes tailored to its express cycle and maintain precise ingredient measurements to achieve consistent, delicious loaves effortlessly.
User Manual and PDF Resources
Oster bread maker manuals are available online, providing detailed instructions, troubleshooting guides, and maintenance tips. Download the PDF to access specific recipes and customization options easily.
Accessing Manuals Online
Oster bread maker manuals are readily available online. Visit the official Oster website or trusted PDF resources to download the manual specific to your model. Use the model number (e.g., CKSTBRTW20 or 5838) for accurate results. These PDF guides include detailed instructions, troubleshooting tips, and recipe settings to help you make the most of your bread maker. Always ensure the source is reliable for accurate information.
Key Instructions from Manuals
Oster bread maker manuals provide essential guidance for optimal performance. They outline basic operations, recipe measurements, and troubleshooting. Specific models like the CKSTBRTW20 and 5838 include tailored instructions. Manuals emphasize accurate ingredient measurements and proper yeast usage. They also cover cycle selections, crust settings, and delay timers. Safety precautions and maintenance tips are included to ensure longevity; Referencing the manual ensures you maximize your bread maker’s capabilities and achieve consistent results.
Dough and Crumb Quality
Proper ingredient ratios and yeast activity ensure light crumb and tender dough. Monitor temperature and humidity for optimal rise. Adjustments in flour type can enhance texture and structure naturally.
Achieving Light Crumb
Achieving a light crumb in Oster bread maker recipes requires proper yeast activation and fermentation. Use high-quality yeast, ensure warm water temperatures, and avoid overmixing dough. Monitor rise times and opt for shorter cycles if necessary. Overproofing can lead to denseness, so adjust settings based on machine type. For Oster models, use the dough cycle to develop gluten without overworking. Light crumb also depends on precise flour-to-liquid ratios and adequate salt levels. Always prefer room temperature ingredients for consistent results.
Preventing Dense Dough
Dense dough in Oster bread makers can result from overmixing, incorrect flour types, or insufficient yeast. Use bread flour for better gluten structure and ensure accurate measurements. Avoid excess liquid and let dough rest adequately. Select the dough cycle to prevent overworking. Check yeast expiration dates and use room temperature ingredients. For specific models like Oster CKSTBRTW20, consult the manual for optimal settings to achieve the right texture.
Dairy-Free and Alternative Options
Explore dairy-free alternatives like almond milk, coconut oil, and flax eggs in Oster bread maker recipes. These substitutes enhance moisture and flavor for diverse dietary needs.
Substitutes for Milk and Butter
Dairy-free options like almond milk, soy milk, or oat milk can replace traditional milk. For butter, try coconut oil, Earth Balance, or avocado oil. These substitutes maintain moisture and flavor in bread recipes while catering to dietary restrictions. Ensure measurements align with the recipe for consistent results. Experimenting with these alternatives can enhance the bread’s texture and accommodate various preferences effectively in your Oster bread maker.
Ensuring Proper Texture
Ensuring proper texture in your Oster bread maker involves balancing ingredients and settings. Use the right amount of yeast and liquid to avoid dense bread. Thorough mixing ensures even gluten distribution. For better rise, use bread flour with higher gluten. Adjust crust settings for ideal browning. Proper temperature and time settings help achieve desired texture. Experiment with recipes to find your perfect loaf.
Additional Tips and Tricks
Master your Oster bread maker with these tips. Always measure ingredients accurately and use room-temperature liquids for optimal results. Experiment with flavors to create unique recipes.
Flour Types
Choosing the right flour is crucial for bread quality. All-purpose flour is versatile, while bread flour provides higher gluten for better rise. Whole wheat flour adds fiber but results in denser loaves. Experiment with rye, oat, or ancient grains for unique flavors. For gluten-free recipes, use a blend of rice, almond, or coconut flours. Always store flour properly to maintain freshness and performance in your Oster bread maker recipes.
Proper Machine Maintenance
Regularly clean the bread maker to remove dough residue and crumbs. Wipe the exterior with a damp cloth and dry thoroughly. The baking pan and kneading paddle should be washed after each use. Avoid using abrasive cleaners or scourers to prevent damage. Lubricate moving parts occasionally and check for wear. Proper maintenance ensures optimal performance and longevity of your Oster bread maker, guaranteeing consistent results in your recipes.
Exploring Oster bread maker recipes opens a world of baking possibilities. From classic loaves to specialty breads, these recipes cater to diverse tastes. For more detailed guidance, refer to the official Oster bread maker recipes PDF, available on their website or support page. This resource provides comprehensive instructions and tips to enhance your baking experience. Happy baking!
- Visit the Oster official website for downloadable PDF guides.
- Explore community forums for shared recipes and tips.